Brewing is a process of precision. You need to measure out your ingredients and run certain processes under precise temperatures. Boiling, for example, requires you to crank up the heat. The next process (fermentation) needs you to cool the wort to 68°F.
Letting the wort cool naturally is one way to do it, but it takes time. Waiting all that time also gives bacteria, fungi, and other unwanted guests an opportunity to invade our beer.
When it comes to cooling wort for fermentation or cold-crashing the fermentation process, no device beats the glycol chiller in terms of efficiency. But therein lies the challenge; glycol chillers are expensive. A glycol chiller could cost you north of $500.
As a homebrewer starting out, this may be out of your budget. If there was a means to get a functional glycol chiller at half that price, would you take it? But there’s a catch; you’ll have to build it yourself.
Join us as we demonstrate how to DIY a glycol chiller with a few supplies and some elbow grease. But first, what is a glycol chiller?
Understanding Glycol Chillers
A glycol chiller is a contraption that works with your immersion chillers to cool fermenting beers. It cools down food-grade glycol (or water) and then pumps it through your immersion chiller to cool your fermenting beer.
To better understand how a glycol chiller works, we need to explain the components of a functioning glycol chiller.
Components of a Glycol Chiller
A glycol chiller has five different components. Let’s explore them all.
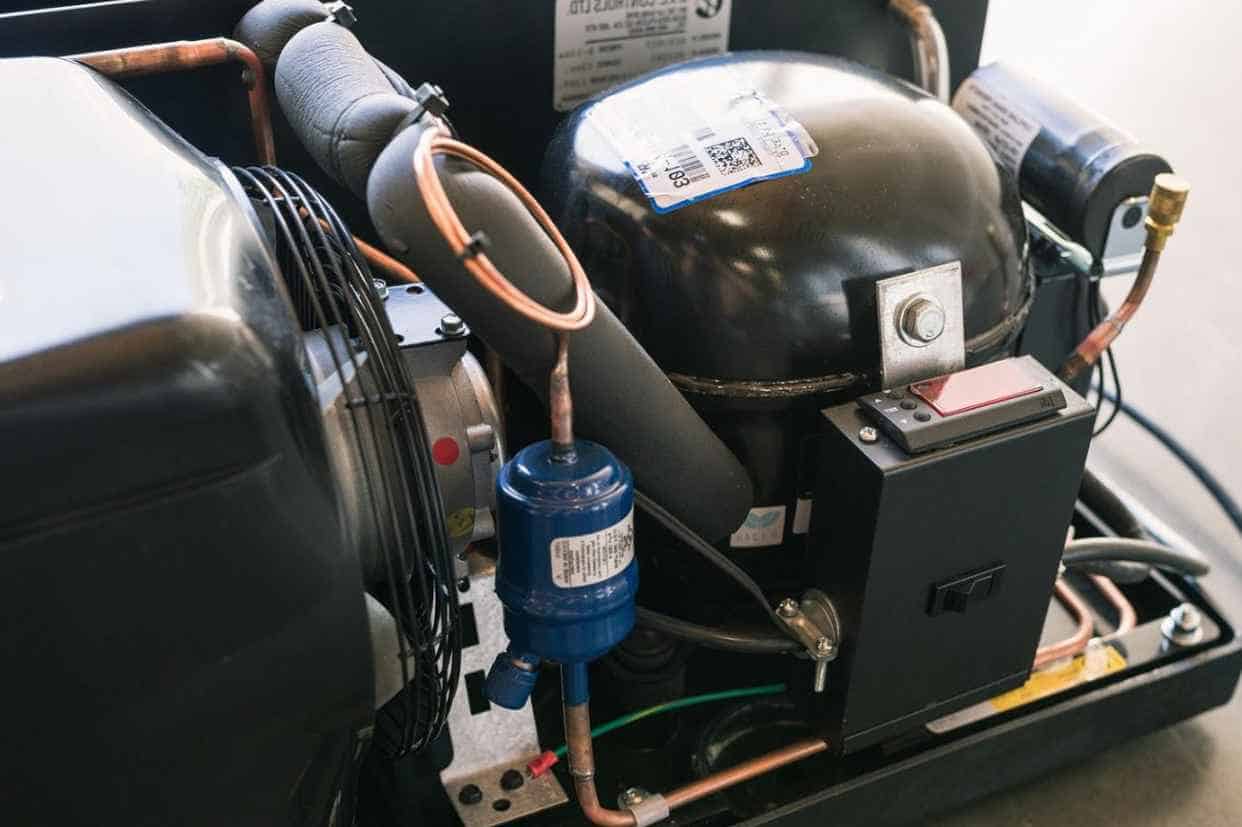
1. Refrigeration Unit
This is the system that cools our glycol before we pump it through the immersion chiller. It’s the typical refrigeration system you find in an air conditioning (A/C) unit.
2. Glycol Reservoir
This is a tank that holds the glycol (which is our refrigerant) as it cools. The reservoir allows storage as it runs in and out of the glycol chiller. The glycol reservoir can hold both glycol and water. But with glycol, you can operate at temperatures below 32°F (water’s freezing point).
3. Glycol Pump
For the glycol to flow out and back into the reservoir, it needs some help. That needed help comes in the form of a pump.
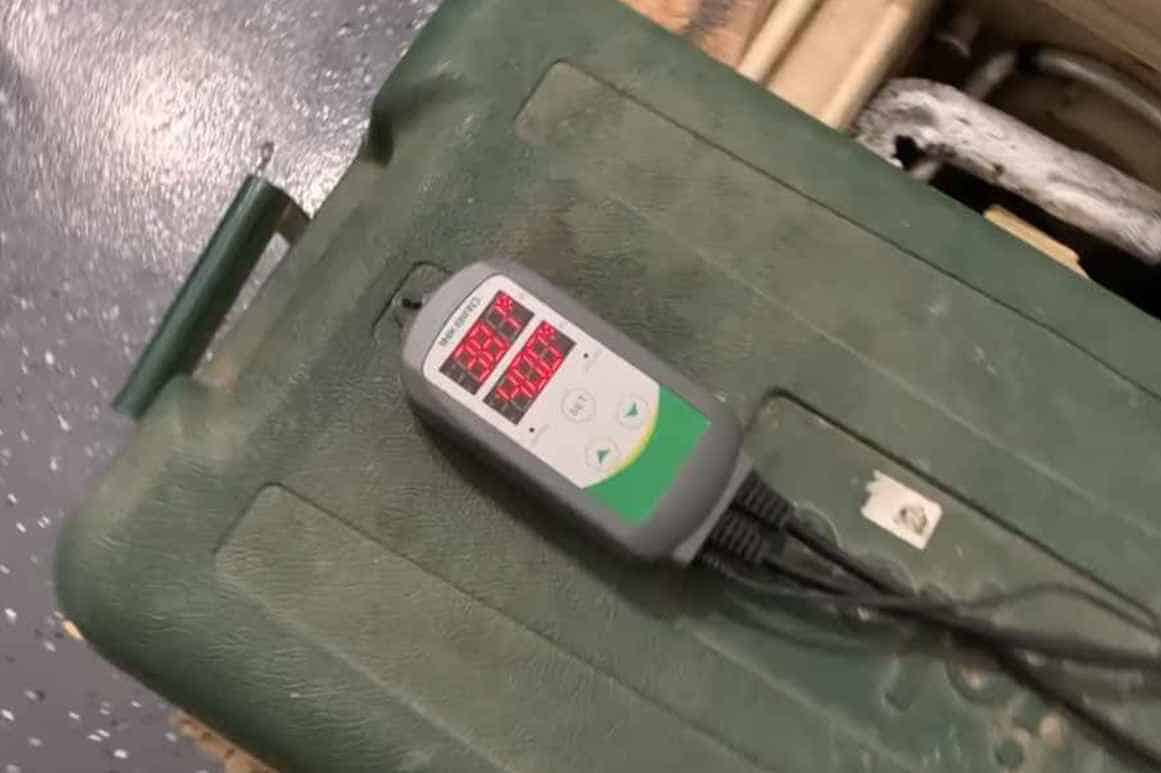
4. Temperature Controller
The temperature controller communicates with the refrigeration system to set your desired temperatures.
5. Control Panel
Finally, we need a medium of communication between the glycol chiller and us. And that’s where the control panel comes in. It lets us set our desired temperatures. It also allows us to monitor the temperature of the glycol in the reservoir.
To DIY a glycol chiller, we need to collect and assemble all these components. But before we get our build on, let’s talk supplies.
Video Source:
What Do You Need?
Add the following supplies to your cart:
- 1 Working Window A/C Unit (new or used)
- 1 Cooler (new or used)
- Plywood
- Food-Grade Glycol
- Screws
- Scrap Wood
- Castor Wheels
- Temperature Controller
- 1 Submersible Pump
- 2 Silicone Hoses
Step-by-Step Building Process
Do you have everything? Great, let’s build.
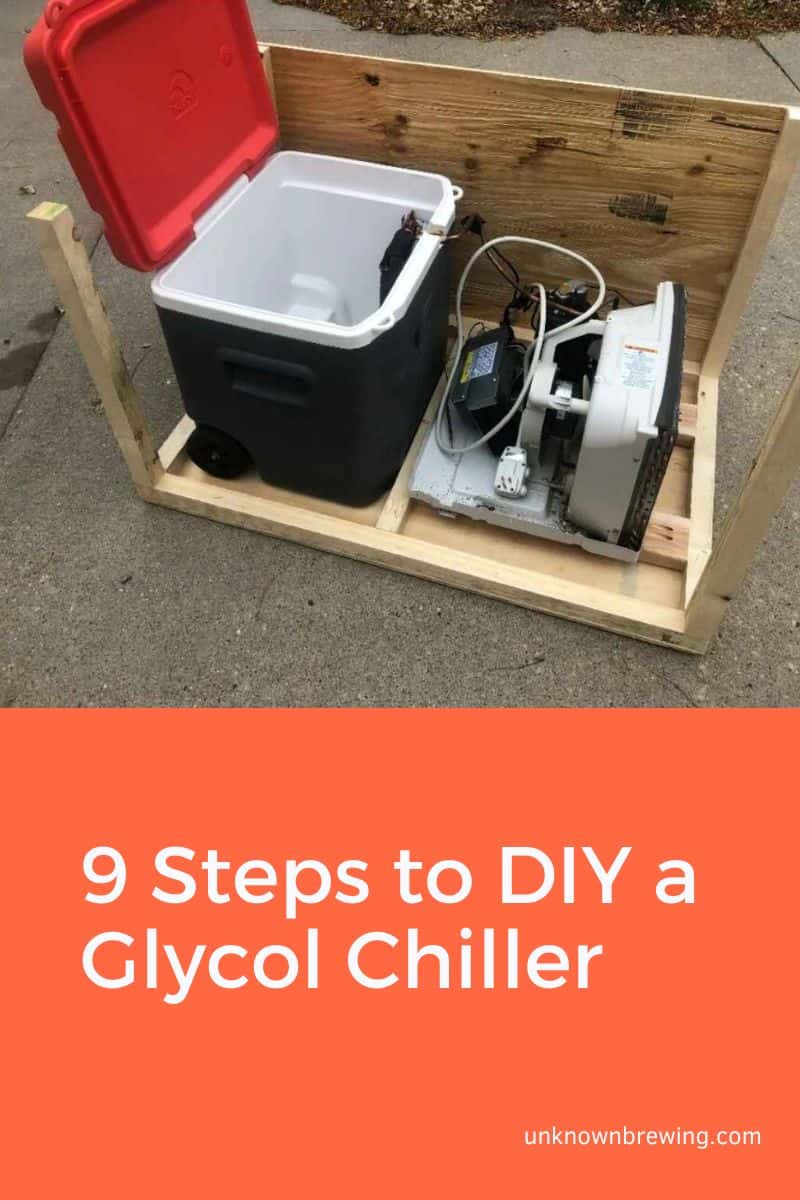
Step 1: Design Your Glycol Chiller
Despite being a “How To” article, you reserve some creative liberties on what you want to build. And it all starts with designing and mapping out where you’d like everything to go.
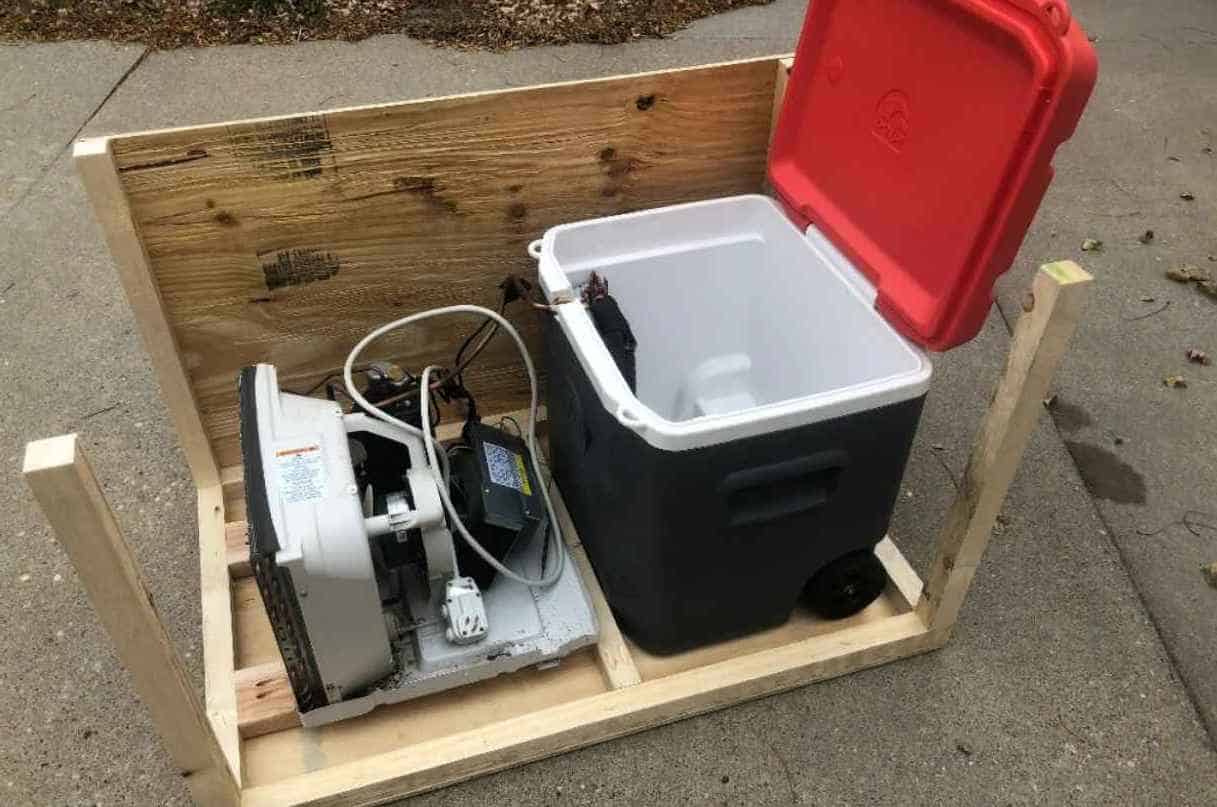
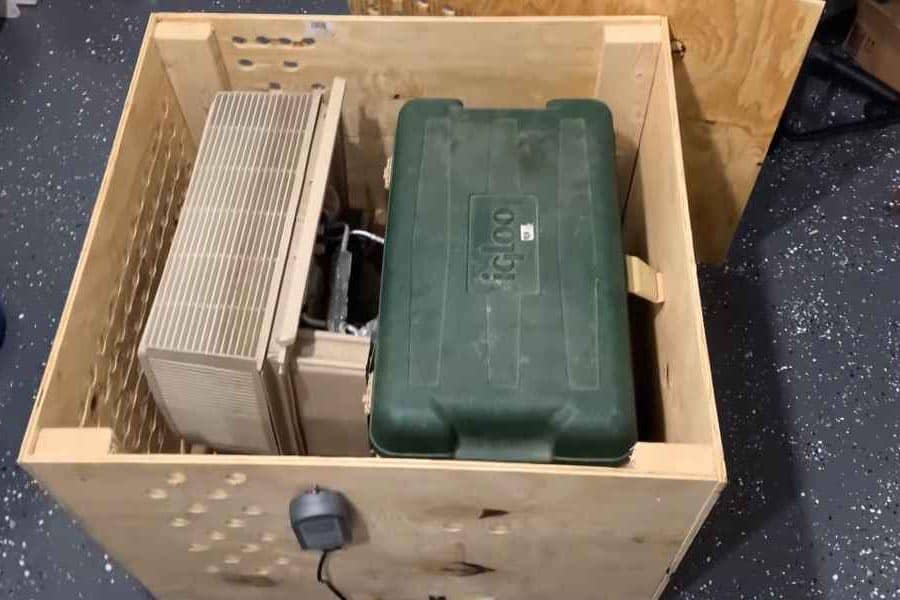
Basically, we want the evaporator of the A/C unit to be submerged in the cooler. We’ll also have a temperature controller connecting everything. And all these components will sit on wooden support on wheels.
Based on this info, you can plan your build. So, take out your sketch pad and draw a rough blueprint of your glycol chiller.
Step 2: Build a Platform For Your Glycol Chiller
A good glycol chiller needs a strong platform, like a rugged vehicle needs a tough chassis.
Based on the design you made in the previous step, trim your plywood as dictated by your blueprint. Once the glycol chiller is done, it will weigh a couple of pounds. So set some sturdy wood for your base.
With your frame complete, fix your castor wheels on the bottom of the platform.
Pro Tip: Don’t screw them too close to the edge of the platform.
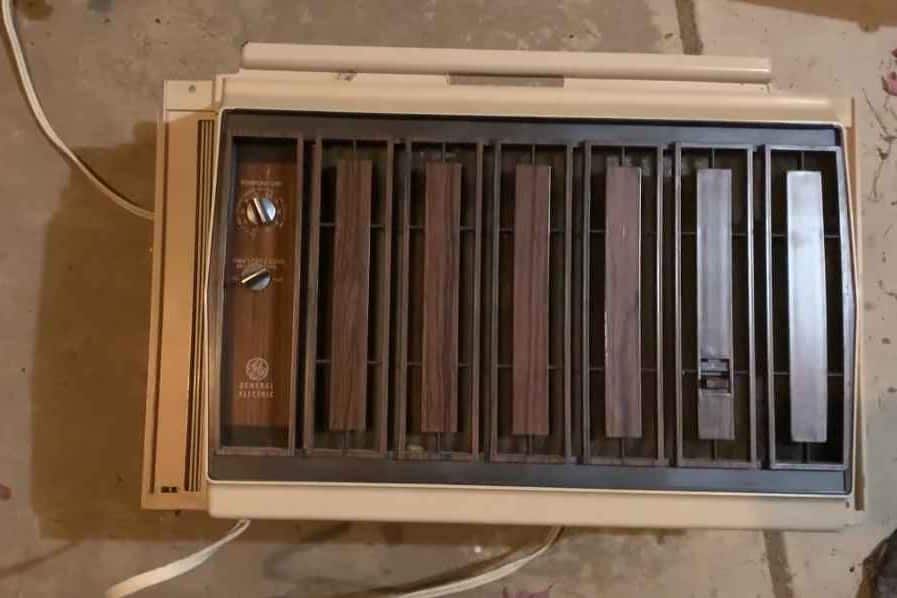
Step 3: Dismantle Your A/C Unit
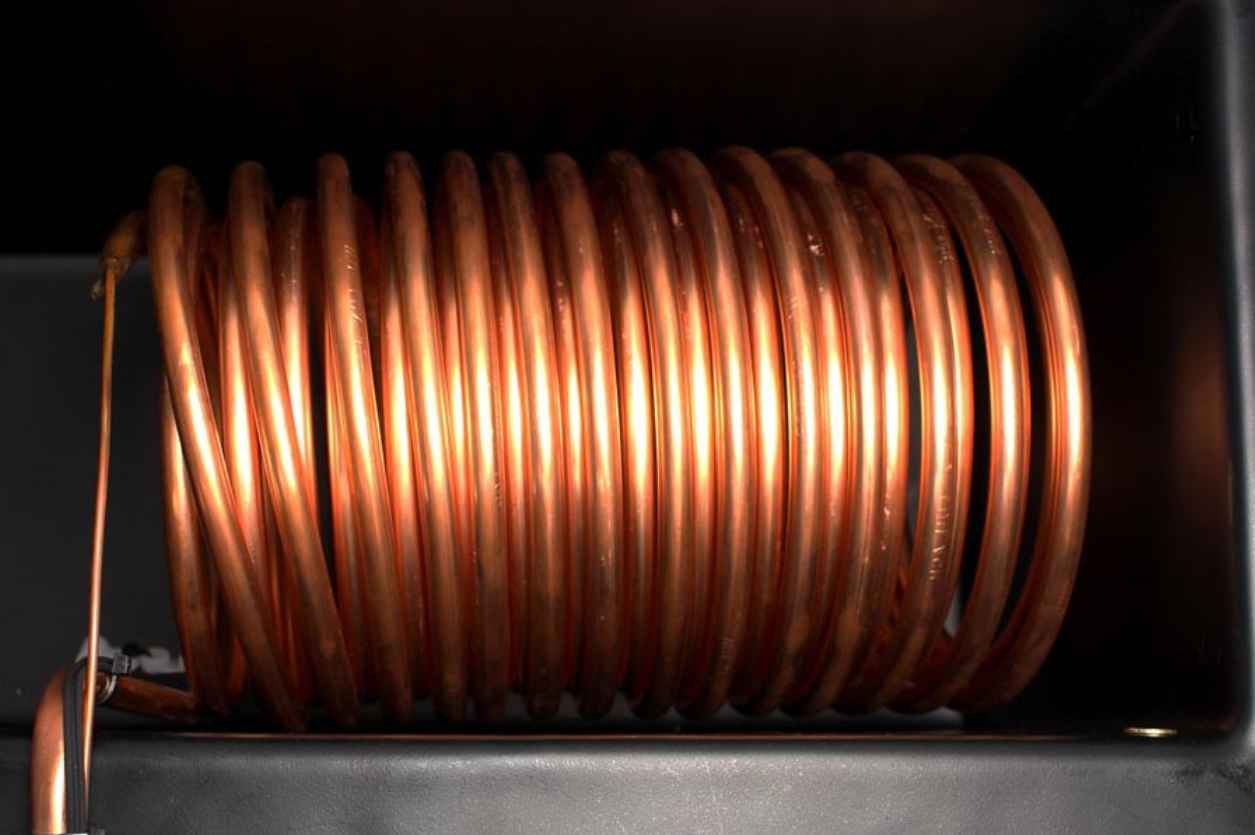
Dismantling your A/C will depend on the make and model of your A/C. Study your A/C unit and figure out a way to open it. Our goal is to expose the evaporation coils, which should be at the front face of your A/C unit.
Pro Tip: Google the make and model of the A/C unit to find disassembly tutorials.
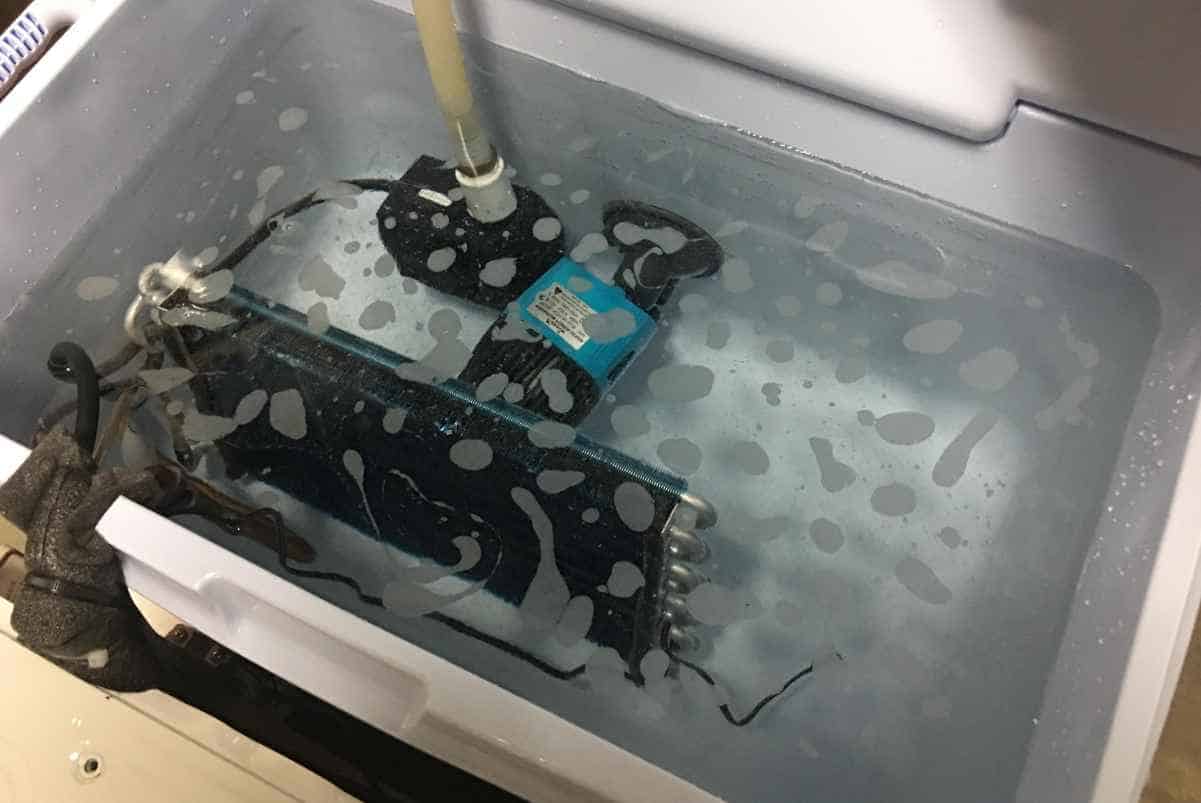
Step 4: Insert the Evaporator Coil into the Cooler
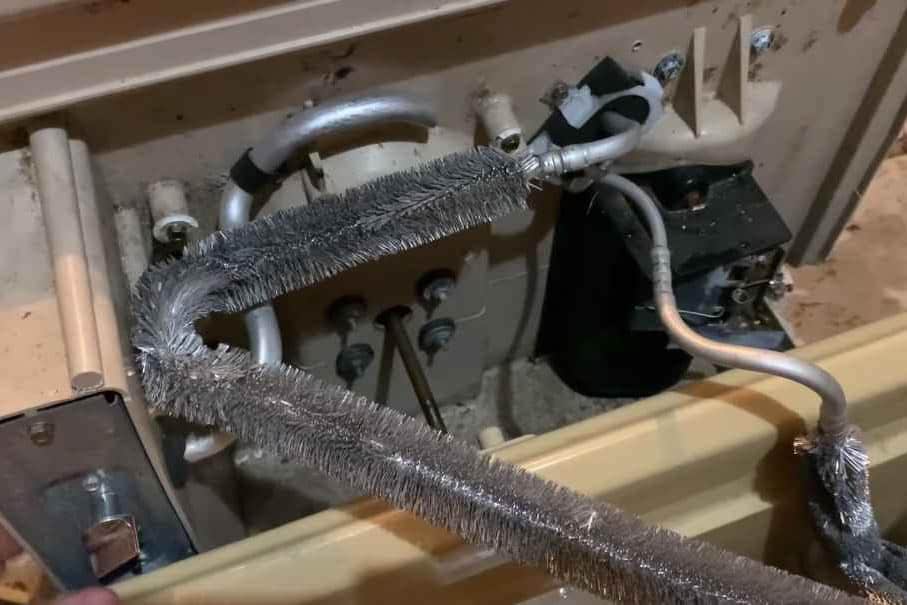
Evaporation coils in air conditioning units are made from copper. And if you have experience with copper coils, you’ll know they are manipulable. You’ll also know that easily kink.
So put on your steady hands and bend the evaporator coils to your will. Most of the bending work will be at the neck of the evaporation coil, where the coil meets the rest of the A/C unit. The rest of the coils can be submerged intact (that’s how we want it, anyway).
Step 5: Test the A/C Unit
Before we proceed with our build, we need to test the A/C unit to ensure that we didn’t break it while twisting and bending the evaporator coils.
So fill your cooler with water, plug your A/C unit into the wall, and turn it on. If the A/C is working, you’ll notice the water turning cold.
Step 6: Cut Out a Notch for Your Evaporator Coils
Perhaps you’ve noticed that the lid of the cooler doesn’t securely close the cooler. That’s a problem easily fixed with a notch on the mouth of the cooler. Figure out how much space is sufficient for the copper lines and cut out an appropriate notch on the mouth of the cooler.
Once the notch is done, slip in the copper lines of the evaporator coil and install the lid. Does it fit perfectly? Bravo!
Step 7: Install Your Temperature Controller
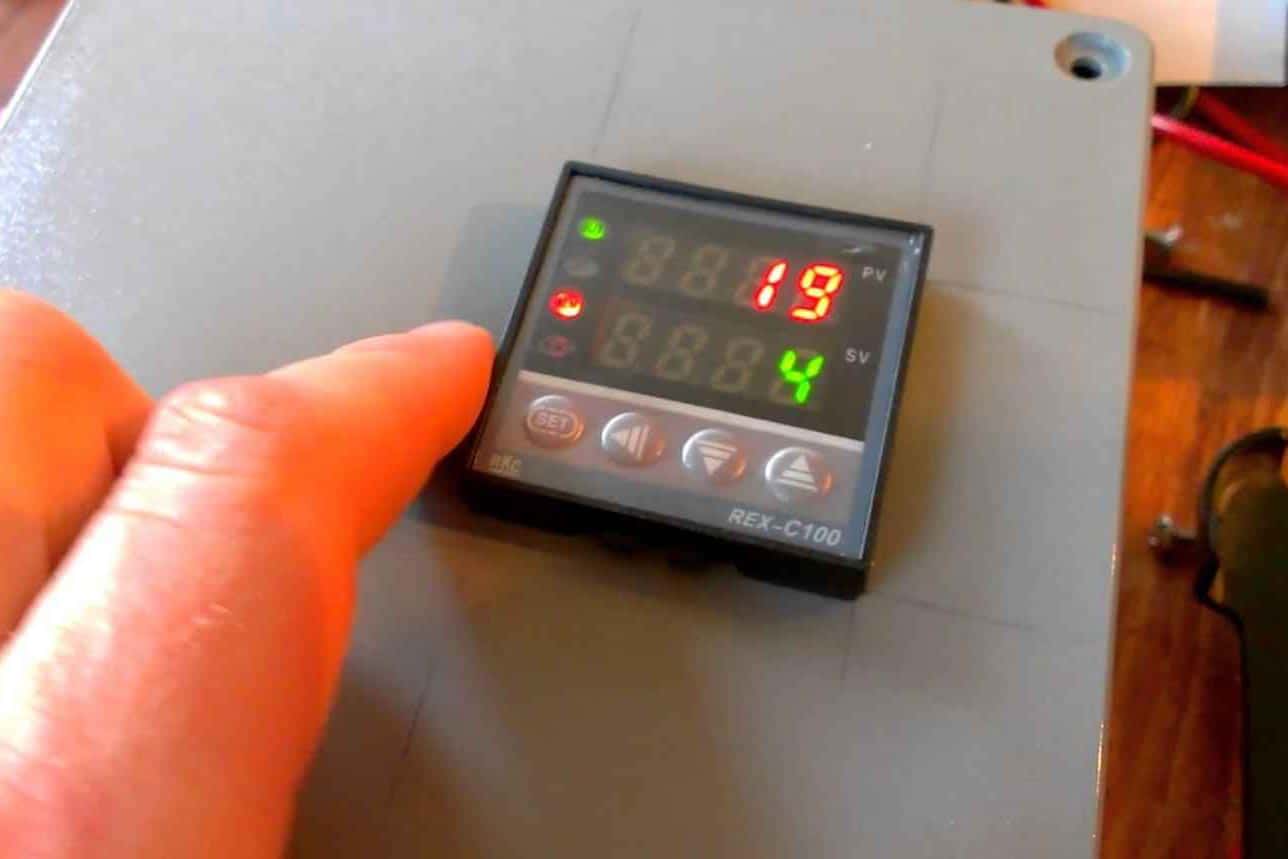
The temperature controller will help us monitor and manipulate the temperature of our glycol reservoir. To install it, insert the sensor into the cooler and plug your A/C into the cooling socket. Finally, plug the temperature controller into the wall.
Step 8: Install Your Submersible Pump
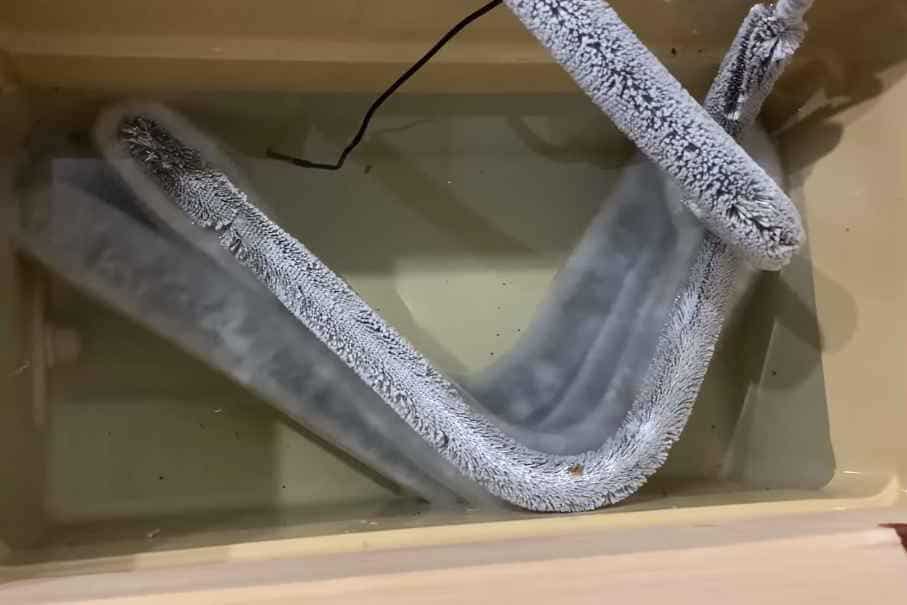
Now we need a way for our refrigerant to flow into our immersion chiller and back to our glycol reservoir. And for that, we’ll borrow the expertise of a submersible pump. Connect your hose to the submersible pump and submerge the pump into your water-filled cooler.
Connect the end of the silicone hose to one of the lines of your immersive chiller. Connect another hose to the other line of the immersive chiller and direct the end of that hose back to the cooler.
Plug the pump into the wall and turn it on. Is the pump circulating the water back into the cooler? Bravo! To test the temperature controller, fill the cooler with water, set a temperature, and see whether the A/C unit complies.
Check whether the silicone hoses can fit in the notch you made earlier. If they can’t dig a little deeper and make a bigger notch.
Step 9: Replace The Water With Glycol
At this point, you have a functioning glycol chiller. Water makes an okay refrigerant, but it limits how low you can set your cooling temperatures. With water, you cannot go below 32°F because water freezes at this point.
But if you want to venture into temperatures below freezing, it’s best to use glycol instead.
That said, pour out the water and fill your cooler with food-grade glycol. Finally, cover the cooler with its lid; we don’t want dirt invading our refrigerant.
Improving Your Glycol Chiller: Alternative Approaches and Modifications
Congratulations, you just built a DIY glycol chiller. But how can you improve your build?
Build a Protective Casing
You can make your glycol chiller presentable with a simple casing. You can make an outer shell from anything; plastic, glass, or metal. Personally, I think wood makes the perfect canvas.
Just remember to punch in some vents for your refrigeration unit. The A/C needs airflow to cool the condenser coils that generate heat.
Remove the A/C Unit’s Fan and Reduce the Fan Speed
The only component of the A/C unit that we are concerned with is the evaporator coils and the mechanisms that support them. We don’t need the fan; it will only make noise. You can choose to uninstall the fan’s propeller, reduce the fan speed, or both.
Figure out a Way to Drain Your Refrigerant
If you’re using water as your refrigerant, you need to work out a way to drain it. If water is left for extended periods, it can get gross. A tap at the bottom of the glycol chiller will help you replace the water without necessarily withdrawing the cooler.
Final Thoughts
Homebrewing is not the cheapest of hobbies. And sometimes you have to stretch your pennies just to keep the hobby going; trust me, I know. DIYing your brewing gear is an effective way to save money on equipment costs.
With the tips above and some elbow grease, you can DIY a glycol chiller. The supplies are widely available, and the build only takes a few hours from your weekend. What’s your excuse?

As a homebrewer, Michael would get frustrated about the lack of brewing information on the internet. After hundreds of gallons of spoilt batches, Micheal had enough. And he founded Unknown Brewing as a resource for homebrewers.