Looking for a cozy and affordable seating solution for your home? Look no further than DIY bean bag chairs! With 15 creative ideas to choose from, you can customize your design, save money, and add personality to any room.
Bean bag chairs are a popular alternative to couches and beds, and they’re portable enough to use as extra seating or take on camping trips. Plus, with these DIY ideas, you can showcase your colorful personality and create a comfortable place to sit and relax. So why not recycle some bags into something completely new and stylish?
Football Bean Bag
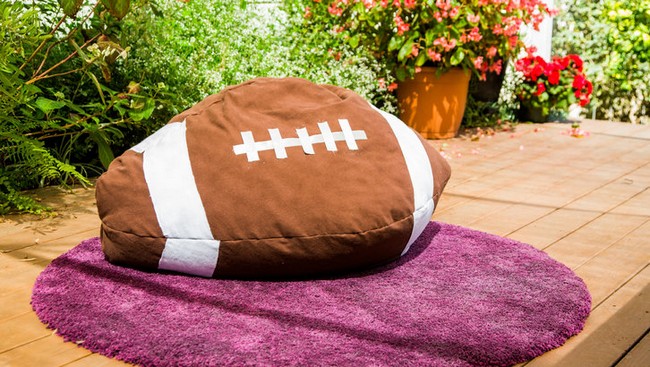
Looking for a fun and easy DIY project that your kids will love? Try making a football bean bag chair! This project is perfect for any child who loves sports or is interested in sewing. You can even customize it with your child’s favorite team’s colors to make it extra special. Not only is it a great addition to a gaming room, but it can also be used on a patio or deck for a comfortable seating option. Follow the link provided for step-by-step instructions on how to create your own football bean bag chair.
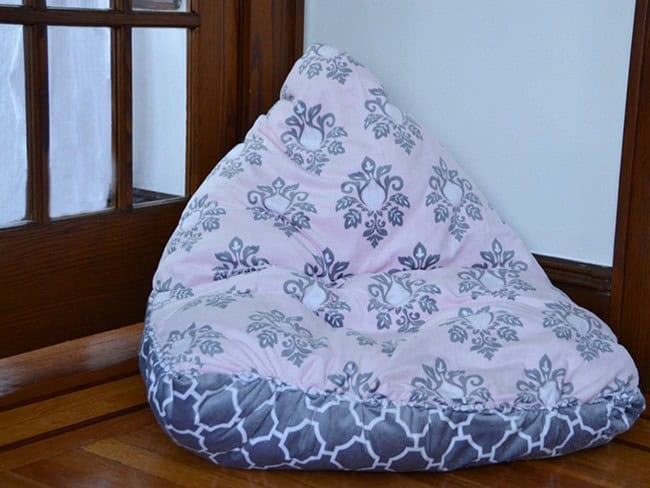
How to Make a Pyramid Beanbag Chair
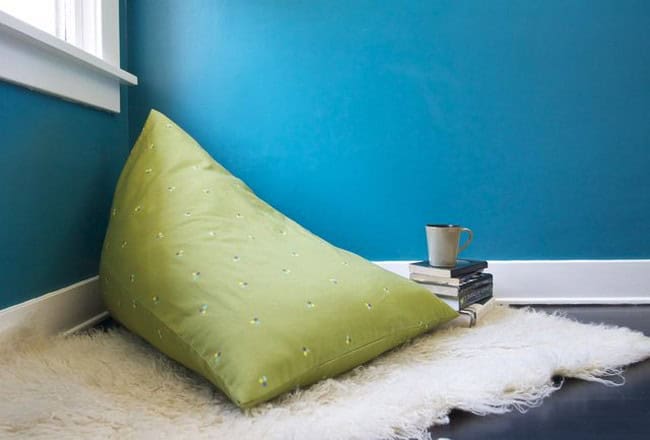
Making a pyramid beanbag chair is a fun and easy DIY project that can add some excitement to your bean bag collection. Here are the steps to make one:
- Gather your materials: You will need fabric, thread, scissors, a sewing machine, and bean bag filling.
- Cut out your fabric: Cut four triangles and one square out of your fabric. The triangles should be the same size and the square should be slightly larger than the base of the triangles.
- Sew the triangles together: Sew the triangles together, leaving the base open. Hem the edges.
- Sew the square to the triangles: Sew the square to the base of the triangles, leaving a small opening to fill with bean bag filling.
- Fill the beanbag chair: Fill the chair with bean bag filling and sew the opening closed.
- Enjoy your new pyramid beanbag chair: Sit back and relax in your new comfortable and stylish beanbag chair.
With just a few hours of your time, you can create a unique and comfortable pyramid beanbag chair that will be the envy of all your friends.
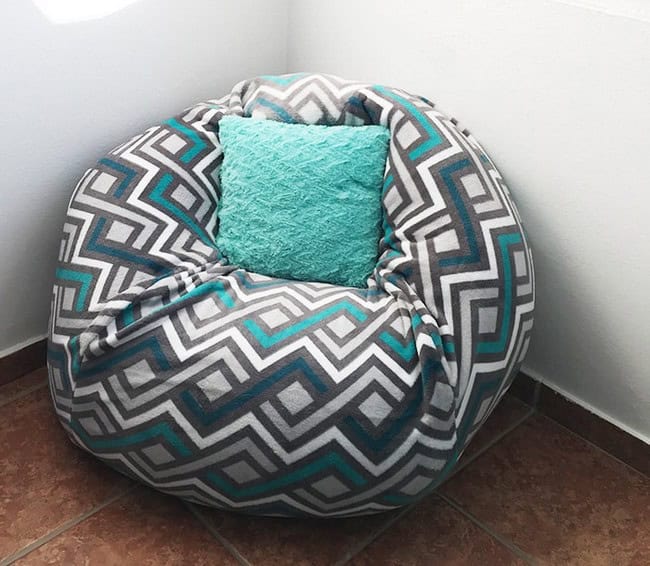
Make a Giant Bean Bag Chair
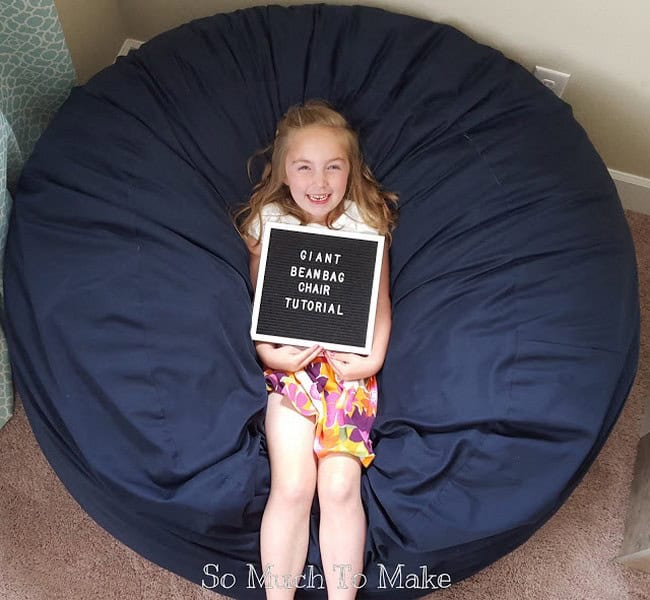
Looking for a cozy and comfortable chair that can be moved around and repositioned as needed? Look no further than the DIY Giant Bean Bag Chair! This simple tutorial will help you sew your own giant bean bag chair, perfect for kids or adults.
To get started, gather your materials and sewing skills. You’ll need fabric, thread, a zipper, and bean bag filling. Follow these steps to create your own bean bag chair:
- Cut out two pieces of fabric in the shape of a large circle.
- Sew the two pieces together, leaving a small opening for the zipper.
- Insert the zipper and sew it into place.
- Fill the bean bag with bean bag filling, making sure not to overfill.
- Sew the remaining opening closed.
Now you have your very own giant bean bag chair, perfect for lounging and relaxing. Enjoy the comfort and versatility of this unique piece of furniture in your home.
Bean Bag Chair Sewing
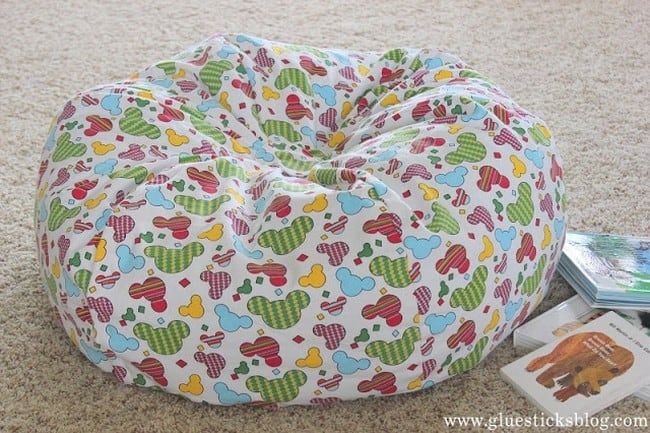
Making your own bean bag chair is an easy and fun project that can be done with a sewing machine and some inexpensive fabric. Follow these simple instructions to create a comfortable seat for reading, watching TV, or just relaxing. Here are the steps to sew your own bean bag chair:
- Choose your fabric and foam. You can order them online or find them at your local office supply store.
- Cut your fabric into two circles and a long strip for the sides.
- Sew the long strip to the circles, leaving a small opening to fill with foam.
- Fill the bean bag with foam, and then sew the opening closed.
- Enjoy your new bean bag chair!
This DIY project is a great way to save money and create a personalized piece of furniture for your home. Whether you want to give it as a gift or use it for extra seating, a bean bag chair is a versatile and comfortable addition to any room.
DIY Bean Bag iPad Stand
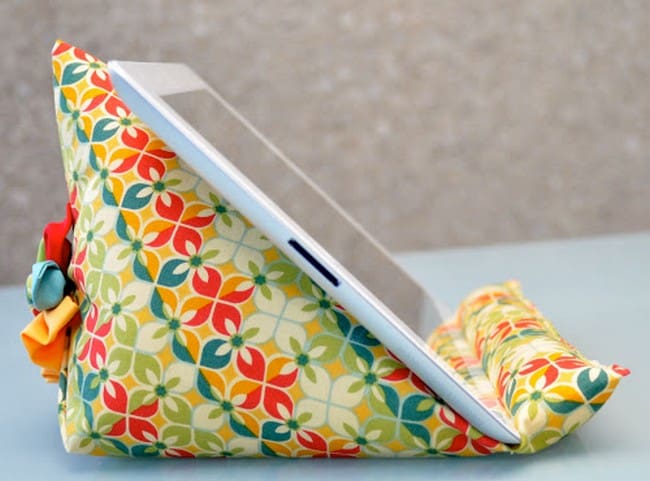
Looking for a cozy way to enjoy your iPad? Look no further than the DIY Bean Bag iPad Stand. This simple and easy-to-follow tutorial will show you how to turn a bean bag chair into a comfortable and practical iPad stand.
Not only can you use this stand for your iPad, but it also works great for propping up your laptop or even as an ottoman. With the addition of a cup holder, you can even enjoy your morning coffee while lounging with your device.
To make this stand, all you need is a bean bag chair and a cutting board. Simply place the cutting board on the bean bag and adjust it to your desired angle. You can even customize the size of the cutting board to fit your specific device.
Overall, this DIY Bean Bag iPad Stand is a great addition to any room. It’s easy to make and provides a comfortable and practical way to enjoy your device.
Bean Bags With Stuffed Animals

If you’re looking for a cozy and cute addition to your room or nursery, consider a bean bag chair with little stuffed animals. With slip covering or reversible knitting techniques, it’s easy to make your own bean bag chair by stitching together the fabric. The best part about this method is that you can remove the stuffing and wash the bag when it gets dirty, and add new stuffing as necessary. With furry little friends to snuggle with, you’ll never want to leave your bean bag chair. Click here to learn more about making your own bean bag chair.
DIY Bean Bag With A Handle

Looking for an affordable way to add extra seating to your home? Look no further than this easy-to-make DIY bean bag chair. With a cost of only $20, you can create a comfortable and cozy spot to watch movies or read books. Customize your bean bag by adding a handle for easy portability and storage. You can even make a larger chair to fit your specific needs. With this DIY project, you’ll have a comfortable and stylish addition to your home in no time. Click the link above to get started.
T-Shirt DIY Bean Bag Chair

Create a comfortable and stylish bean bag chair for your home with this easy DIY project. You can make it with a recycled t-shirt, cardboard, and simple sewing. The pillow seat is extra comfortable and so simple to create! Even if you’ve never sewn before, this project is perfect for beginners and doesn’t require any sewing skills or prior experience. Once you’re finished, use your custom-made bean bag chair to relax after a long day sitting in an office chair or sofa. Click on the link provided to get started on this fun and easy project.
Easy Bean Bag
Creating your own bean bag chair is a simple and fun DIY project that will add a cozy touch to any living space. With just a few steps, you can make a comfortable and stylish bean bag chair that your kids and guests will love. Follow these easy step-by-step instructions to make your own bean bag chair:
- Choose your fabric and filling material
- Cut out your fabric pieces according to the pattern provided
- Sew the pieces together, leaving a small opening for filling
- Fill the bean bag with your chosen filling material
- Sew the opening closed
With these simple steps, you can create your own bean bag chair in no time. So why not give it a try and enjoy the comfort and relaxation that a bean bag chair can provide? Click the link provided to get started.
How to Make a DIY Bean Bag Chair

Making your own bean bag chair is a fun and easy project that can add a touch of personality to any room. To create your own DIY bean bag chair, you will need a few materials and some basic sewing skills. Here are the steps to follow:
- Gather your materials: You will need a recycled fabric shopping bag, beans or filling material, a sewing machine, and thread.
- Cut the fabric: Cut the fabric into two circles, each measuring 30 inches in diameter.
- Sew the circles: Sew the two circles together, leaving a small opening to fill with beans or filling material.
- Fill the bag: Fill the bag with beans or filling material until it is the desired size and shape.
- Sew the opening: Sew the opening closed using a needle and thread.
- Add color: Add some color to your bean bag chair by spraying it with water and letting it dry. You can also sew the chair with different colored fabrics or add more pockets if you prefer.
Making your own DIY bean bag chair is a great way to add style and comfort to your home. With a few materials and some basic sewing skills, you can create a unique and personalized piece of furniture that you can enjoy for years to come.
Bean Bags for Kids

Bean bags are a great addition to any kid’s room, playroom, or bedroom. They provide a cozy and comfortable place for kids to relax, read a book, watch TV, or even hang out with friends. DIY bean bag chairs are easy and inexpensive to make, and they can be customized to fit any decor. The simple design of the bean bag makes it easy to sew, and it’s a fun project to do with your kids. Plus, it’s a great way to teach them about recycling and upcycling old materials. Click the link above for a step-by-step guide on how to make your own bean bag chair.
No-Sew Bean Bag
Looking for a fun DIY project that won’t take up too much time? Consider making a no-sew bean bag chair! This easy project only requires a few materials and no sewing machine. All you need is an old shirt, some pillows, and stuffing. You can even customize your bean bag chair by using different fabrics on each side.
Here’s how to make your own no-sew bean bag chair:
- Cut the sleeves and collar off of an old shirt.
- Stuff the shirt with pillows and stuffing until it’s firm.
- Tie the bottom of the shirt closed tightly.
- Cut a round piece of fabric that’s larger than the shirt and place it on top of the shirt.
- Fold the edges of the fabric over the shirt and tie it closed tightly.
- Flip the bean bag over and enjoy!
With this simple DIY project, you can create a comfortable and stylish addition to your living room without spending a lot of money. So, grab some materials and get started on your own no-sew bean bag chair today!
DIY Bean Bag Couch
Looking for an easy and affordable way to create a comfortable and relaxing spot in any room? Look no further than this DIY bean bag couch. With just a few simple steps, you can create a customizable couch that is perfect for taking a load off. Here’s how to make your own bean bag couch:
- Start by choosing the fabric you want to use for your bean bag couch. You can use any type of fabric, but a durable, washable material is recommended.
- Cut two pieces of fabric to the desired size of your couch. The size can vary depending on your preference, but a standard size is around 6 feet by 4 feet.
- Sew the two pieces of fabric together, leaving a small opening to fill the bean bag with stuffing.
- Fill the bean bag with your choice of stuffing. You can use anything from shredded foam to polystyrene beads.
- Once the bean bag is filled to your desired level of comfort, sew the opening closed.
- Optional: Add a removable cover to your bean bag couch for easy cleaning.
With these simple steps, you can create a comfortable and customizable bean bag couch that is perfect for any room in your home. So why not give it a try and enjoy the comfort and relaxation of your very own DIY bean bag couch?
Kids Bean Bag Chair (Sew in 30 Mins)

If you’re looking for an easy and fun DIY project for your kids, consider making a bean bag chair! With just a few materials such as polyester fabric, elastic and beans, you can create a bean bag chair that your kids will love. This project only takes 30 minutes to complete, making it a quick and easy way to add some fun to your playroom or outdoor space. The chair is perfect for relaxing, reading, or watching a movie, and the headrest, straps, and seat cushion can be added for extra comfort. Click the link above to get started on your own bean bag chair project!
Super Simple DIY Kids Bean Bag Chair

Creating a comfortable and portable bean bag chair for your kids is easy with just a few supplies. This fun sewing project uses cozy impact fabric to keep them warm and an inner bean bag to make it ultra-comfortable. Your kids (and adults) will love being able to bring it to friends’ houses or out camping. Follow these simple steps to create a unique bean bag chair that your kids will adore:
- Cut two pieces of impact fabric into a circle shape.
- Sew the pieces together, leaving a small opening.
- Fill the inner bean bag with foam beads or beans.
- Insert the bean bag into the impact fabric cover.
- Sew the opening shut and enjoy your new bean bag chair!
Summary
Creating your own bean bag chair is a fun and easy DIY project that can be completed in just a few hours. By using durable fabrics, such as denim or canvas, and filling the chair with polystyrene beads, you can make a comfortable and stylish addition to your home. With simple sewing techniques and a few basic materials, you can personalize your bean bag chair to match your unique style and taste. Follow these steps to create a cozy and inviting bean bag chair for your home.